One of the best ways to improve your golf game is through the use of drills. Rather than just listening to some instruction provided by a golf pro, a drill allows you to get involved in the process of improving your technique. Good drills are designed in such a way that they allow you to feel a specific movement or position which you will need in your swing (or putting stroke). In addition, good drills also are able to build confidence in the player by allowing him or her to see success over and over again. Any golfer who would like to steadily improve their game over time should have a list of drills that they can use during practice to keep things moving in the right direction.
In this article, we have collected ten of the best golf drills that have been developed over the history of this great game. Some of these drills may not apply directly to the problems that you are experiencing in your game at the moment, but others could be exactly what you need to get on track. Some of these drills will need to be completed while at the driving range or practice putting green, while others can be done at home.
All of the instruction within these drills has been written from the perspective of a right handed golfer. If you happen to play left handed, please take a moment to reverse the directions as necessary.
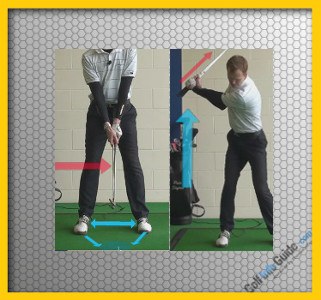
It is important to have great balance throughout your golf swing, and this drill is going to address that issue directly. If you can make it all the way through the start and stop drill without feeling off balance at any point, you can be confident that you are controlling the movement of your weight properly.
To get started with this drill, take your driver from the bag and find a safe place to make some swings. You can certainly do this drill at the driving range (even though you won’t be hitting any balls), or you can do it at home if you have room outside to swing the club safely. You aren’t going to be hitting shots within this drill, but you should pick out an imaginary target for each swing so you can practice lining up correctly over the ball. Once you are in your stance and ready to swing, follow the steps below to work through the drill.
1. Start you swing as you would normally and go through the takeaway with an even, smooth tempo. When you reach the point where the shaft of the club is parallel with the ground, stop your swing and hold yourself in place.
2. After you have held the previous position for a couple of seconds, start your swing up again and proceed to a point where the club is pointing up to the sky. Stop again, pause for a couple seconds, and move on to the next step.
3. In this step, you are going to complete the backswing and pause when you get to the top. Hold the top of the backswing position for a couple more seconds, then swing down to the impact position. Pause yourself again at impact – you won’t be able to swing down at full speed if you are going to pause at the bottom, so make a controlled move down – and wait there for two more seconds before finishing the drill.
4. As the last step, swing from impact up to the finish position, and hold yourself there while you watch the imaginary ball fly through the sky.
So what is the point of all this starting and stopping? Simple – you are going to be checking your balance at each stop along the way. By breaking up the swing into a collection of small pieces, you should be able to easily evaluate the quality of your balance throughout the action. If you are having trouble with your balance, this drill will point out exactly where within the swing things are going wrong.
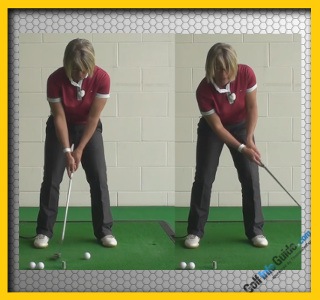
As far as golf drills go, they don’t come any simpler than this one. To perform the three-footer streak drill, you set up three feet away from a hole on the practice green and roll in as many putts in a row as possible. If you are a little shaky with your short putting, it might be a good goal at the start to just make five in a row. However, as time goes by and you improve on your mechanics, you should able to easily make 10 straight – if not many more than that.
To add variation to this drill, you can vary your distances anywhere from three to five feet. For example, you could start at three feet with the goal of making five straight putts. Once those five drop in, you move back to four feet and do the same thing. If you are successful at four feet, you attempt to finish off the drill with five more makes from the five-foot mark. If any of your putts along the way miss the cup, you go back to three feet and start over.
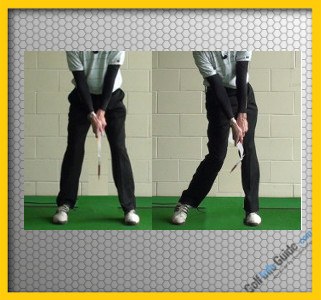
In this drill, you aren’t even going to use a golf club – or any of your golf equipment, for that matter. To perform this drill around the house, you will just need a relatively thin bath towel and some room to work with. Once you have found a towel to use for the drill, lay it out on the ground and roll it up along the long side. When the towel is rolled up, tie a knot into one end of the roll (this is why it is best to have a thin towel – they make it easier to tie a knot).
At this point, you should be left with a rolled up towel with a knot on one end. The end with the knot is going to serve as the ‘club head’, so you will want to take your normal grip around the end of the towel that is still rolled up. With your grip taken and the knotted end hanging down toward the ground, take your stance as you would before any regular shot on the course. From here, you are simply going to attempt to make a golf swing from start to finish.
Obviously, the towel is going to feel like the softest club shaft in the world, which is exactly the point of the drill. To make any kind of functional swing, you will have to move through the swing with a slow and steady tempo. Allow the knotted end of the towel to swing along gradually while the rotation of your body controls your movements. It will be difficult to make a decent swing at first, but you should get better and better at this drill with some practice. When finished, go back to swinging a regular club (if you are somewhere you can swing safely) and try to feel the same kind of smooth tempo that you found when swinging the towel.

One of the best ways to improve your chipping performance is by using the ‘spot chipping’ technique from around the greens. With this technique, you are going to focus less on the hole itself and more on a spot that you pick out on the green as your target. The spot you select will be based on the bounce and roll you expect after the ball has landed. If you pick the right spot – and then hit that spot – you will see your ball bounce and roll right up next to the cup.
To practice this method of chipping, head to the short game practice area of your local course and find a hole to use as your target. Pick out a landing spot that you feel will be appropriate for the shot and lay a small golf towel down on the green over that spot. From there, the drill is simple – hit some chip shots while trying to land your ball on the towel. Having a physical object on the green will make it easier to see what you are trying to accomplish with your swing, and you will probably have more success as a result. After a period of practice, take the towel away and hit a few more chips while picturing the target in your mind.
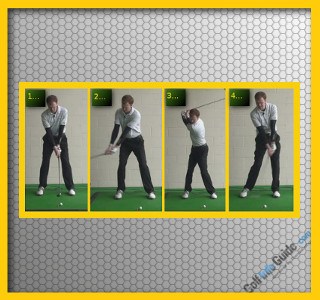
During your next trip to the driving range, consider using this drill to check on the quality of your balance in the swing. This drill has a similar effect to the first drill on our list, except this time you are going to be able to actually hit some shots. Again you are going to want to swing your driver for this drill, and you should always pick out a target for each swing. As the title of the drill indicates, you are going to swing the club with roughly 50% effort, and the ball will fly significantly shorter than your normal drives as a result.
The nice thing about this drill is the fact that you don’t need to make any other changes to your technique. You are going to use your regular swing all the way through, only you are going to be moving at half speed. By slowing things down, any awkward spots in your technique will be highlighted. After just a few shots in this drill, you should be able to confidently determine if there are any glaring problems within your technique that need to be improved. For instance, if you are struggling to hold your balance at the top of the swing, you will need to check on your backswing mechanics to see where things are going wrong.

This is one the best short game drills you can complete, although you will need to have access to the right kind of practice area in order to use it properly. Based on the name of the drill, you can probably guess the idea here – you are going to hit a variety of short game shots from as many bad lies as you can find. Of course, that means that you should look for a practice area which offers as many different kinds of lies as possible. For instance, a practice area with slopes, rough, short grass, and sand would be ideal.
Once you find a good practice area for the job, take five golf balls and toss them into the toughest lies you can find. There should be plenty of variety in the lies that you give yourself or this drill, as having to deal with different kinds of lies is exactly what you will need to do out on the course. Spend a few minutes during each of your practice sessions working on chipping and pitching from bad lies and your short game is sure to improve rapidly.
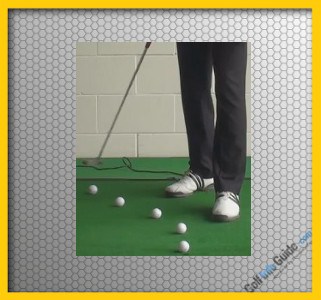
Speed control is a crucial piece of the putting puzzle, yet most golfers fail to work on their speed control when they step onto the practice green. By using the ladder drill, you can quickly and easily work on your ability to control exact how far the ball rolls with each stroke. To use this drill during your next putting practice sessions, follow the instructions below –
1. Set five golf balls down on the putting green and find a relatively flat stretch of the green to use for the drill. You should be about 30’ away from the hole you are going to use as your target.
2. Walk up toward the hole and place a tee in the ground approximately 10’ short of the hole itself (so the tee will be about 20’ away from where you are putting).
3. With your first putt, the goal is to roll the ball just barely past the tee, but well short of the cup. If you are able to roll the ball past the tee, you move on to the next ball. With this second ball, you need to roll your putt past the first ball, but again short of the hole.
4. This process continues with all five balls. The goal with each putt is the same – to hit the current putt farther than the previous putt, but still short of the cup. If you are able to work through all five balls successfully, you will know you have done an excellent job of speed control.
Of course, you can certainly use this drill in reverse by hitting your putts shorter and shorter each time. The idea here is that you learn how to take speed off or put speed on to your putts just by making minor variations to your stroke. If this drill becomes a regular part of your practice routine, you should quickly notice that your ability to hit putts with the proper speed on the course improves dramatically.
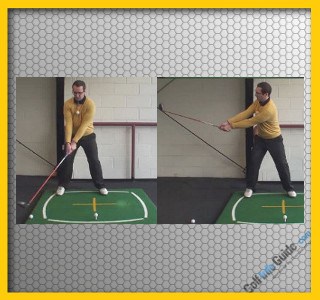
This is one of the most-popular golf swing drills among amateur players, and for good reason. You can use this drill to help eliminate your tendency to slice the golf ball, as it will work to improve the path of your swing moving through the hitting area. Obviously, the slice is a major problem within the game, so any golfer struggling with a slice should give this drill a try during an upcoming practice session.
To go through the drill, take your driver from the bag while you are at the driving range. Set up a ball on a tee and the appropriate height, and pick out a target for your shot. Before taking your stance, however, you are going to take the headcover from your driver and place it on the ground on the outside of the target line. Basically, the headcover should be positioned so that a swing which is coming in on a good path will miss it completely, while a swing that is coming from outside-it will make contact with the headcover.
Now that you are set up, go ahead and make a swing while trying to avoid hitting the headcover on the way through. To do so, you may need to make some corrections to your current technique (assuming you fight a slice from time to time). There may be a few failed swings at first while you get the idea of swinging on a proper path, but most people are able to work through those failures in order to start hitting the ball cleanly without the headcover getting in the way.
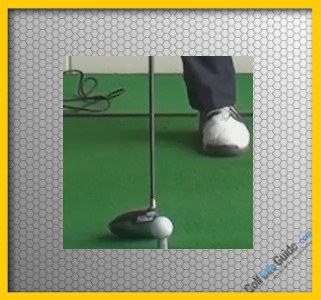
For this drill, you are going to need to have access to a golf course where you can take your time while going around. This is not a drill for a busy Saturday morning when you need to keep up with pace of play rules – this is a drill for a quiet Tuesday afternoon when you are the only person on the course. You will need time and space because you are actually going to hit each shot twice while you make your way around nine or eighteen holes. However, rather than playing best ball as some golfers like to do, you are actually going to play ‘worst ball’.
So, on the first tee, you are going to hit two shots. When you find those shots, you are going to pick the worst of the two and then use that as the spot for your next shots. Again, you play two shots from that spot and play the worst ball again. This process repeats throughout the course of the round (you can decide whether you want to continue the drill while putting or not). The point of this drill is to teach you how to play from tough spots around the course. Most likely, you are going to find yourself in plenty of poor spots when using your worst ball, so there will be plenty of opportunities to develop new skills along the way. Also, this drill will do a good job of teaching you how to keep your patience while dealing with adversity.
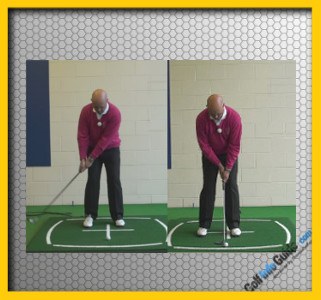
Many golfers would count this drill among their favorites, and that is the case for a number of reasons. The drill itself is simple enough – you chip and putt your ball in the short game practice area while trying to get up and down as many times as possible. You can play this as either a nine-hole or eighteen-hole drill, with a par of two on each hole that you play. So, naturally, par for a nine-hole version of this drill is 18, while the full version of the drill has a par of 36.
The best way to do the drill is just with two clubs, a wedge and a putter, and one golf ball. Drop the ball somewhere around the green, chip it toward a selected hole, and knock in the putt. Repeat this process for as many holes as you would like to play, and keep score as you go. If you have a practice partner you can have a friendly competition based on your scores. If not, simply remember your own personal best and try to beat that mark during each practice session.
There is a lot to like about using golf drills to help improve your skills week after week, year after year. In addition to the physical improvements that you can make through the use of the ten drills listed above, you can also improve on your mental performance thanks to the lessons learned along the way. To get the maximum benefit from using drills during your practice sessions, you should pick out the drills that you feel will address the specific problems you are currently facing in your game. Over time, those problem areas will change, so you should adapt the drills you are using as necessary to keep up with your needs. Good luck and play well!


