Pro golfers spend hours each week honing their putting strokes; the intense practice helps them adjust to the minute green variations that crop up during a four-round tournament. The ability to add or subtract a fraction of pace can make the difference between missing the cut and walking away with a giant cardboard winner's check.
The “ladder drill” is a staple of the pros, and it should be part of your practice routine, too. Do it regularly and you'll develop the feel needed to hit a putt an extra foot when necessary, or to take just enough off a downhill putt to prevent the ball from racing past the cup.
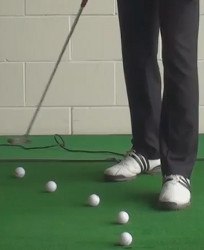
- Find an open space on the green (or the home carpet) and drop five balls.
- Stroke the first ball 10-20 feet away; don't worry about direction.
- Try to hit the next ball a foot past the first one, the third ball a foot past the second, and so one.
- Done correctly, the balls will line up like the steps on a ladder (hence the name).
- The goal is to hit each successive ball slightly farther, so that the fifth ball is no more than five feet from the first one.
- After the first series, hit the next group a little farther. Try it on uphill, downhill and sidehill slopes as well.
The farther out you can successfully “build the ladder,” the better your touch will be.

Putting Distance Control Golf Drills
Your performance on the greens is going to go a long way toward determining your score in any given round of golf. Putt well and you will have a chance to post a good score. Putt poorly and it is almost certainly going to be a frustrating day on the links. While most amateur golfers spend the majority of their practice time on the driving range, it is really the practice putting green which will make or break your game. Learn to work hard on your stroke and your scores should come down almost immediately.
One of the biggest keys to putting success is controlling your distance properly. Many golfers obsess over the line of their putts without thinking much about speed, but this is a mistake. The line is important, obviously, but a good line will do you no good at all if you don't have the speed control to match. Work on dialing in your speed perfectly and you will become a better putter in time. Not only will speed control help you make putts from inside ten feet, but it will also help you avoid those dreaded three putt greens which can quickly derail a good round. Playing good golf isn't so much about hitting great shots as it is about avoiding mistakes. Steering clear of three putts is a major step toward the goal of a lower handicap and new personal records.
In this article, we are going to provide you with a variety of drills which will help you improve your distance control on the greens. Rather than wandering aimlessly around the putting green, hitting putts at random holes for no particular reason, these drills will provide some structure to your practice sessions. You are certain to get a better return on your investment of time when you have specific drills in mind to use before you even arrive at the course.
It is a good idea to structure your entire practice session in advance, not just your time on the putting green. Before you head out to practice, decide how much time you have available and then segment that time to make sure you hit each area of your game properly. For instance, if you have one hour available, you could divide those 60 minutes into four segments. To start, you would putt for 10 minutes, during which time you would use some of the drills included in this article. From there, you could go to the short game area to chip and pitch the ball for 20 minutes. When that time has elapsed, you head over to the driving range for 20 minutes of full swings. Finally, you will return to the putting green for 10 more minutes of putting to finish things off. In the end, you will have spent 20 minutes putting, 20 minutes chipping/pitching, and 20 minutes hitting full shots. Your entire game will have gotten a workout, and you will be a better player for the effort.
All of the content below is based on a right-handed golfer. If you happen to play left-handed, please take a moment to reverse the directions as necessary.
Controlling Your Lag Putts
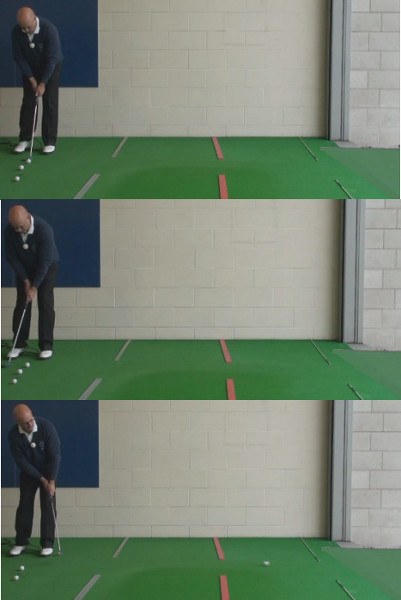
Lag putting is a crucial skill in the game of golf. If you can't control the distance of your lag putts, you are always going to struggle to avoid three putt greens. While it would be great to hit the ball close to the hole all day long, that just isn't reality in golf. You are going to face plenty of long putts in each and every round that you play – how you handle those long putts will say a lot about your score at day's end.
In this first practice drill, we are going to ignore the holes on the practice green entirely. Instead of aiming at the holes, you are going to use the edge of the green – where the putting green transitions to the fringe – as your target. Using this approach will move you away from a line-based way of thinking, instead forcing you to pay attention to distance above all else. To perform this drill during your next trip to the practice green, please follow the directions below.
- Find a long stretch of green which you can use for this drill. Obviously, you should look for a path which you can use while not disturbing anyone else who may be practicing at the time. The length of the putt you are able to setup will depend on the size and shape of the practice green, but try to find a path which allows you to roll the ball at least 30 or 40 feet. Also, look for a relatively flat stretch of green when first getting started. You can work on sloping putts later, but picking out a flat part of the green is a great way to begin.
- Once you have your putt pick out, set three golf balls down on the green at your feet. While you aren't going to be picking a very specific line for this putt, you should at least have a general stretch of fringe that you are aiming for on the other side of the green.
- The goal of this drill is simple – to roll each putt as close to the fringe as possible without going too far. At first, this is going to be a significant challenge. However, you should get better and better as time goes by.
- Once you have rolled all three balls across the green, turn around and putt back in the other direction. Work back and forth for a few minutes until you feel like you have improved on your ability to control the distance of your putts.
This is a great drill to use to start off your putting practice sessions. Many golfers start their practice by hitting short putts, but you will be better served to work from long range instead. Once you dial in your distance on the lag putts, then you can work your way in to shorter challenges.
As you work on your long lag putts, you may notice that your technique needs to be refined slightly in order to achieve success. To make sure you are giving yourself the best chance for success when lagging the ball, keep the following points in mind.
- Steady head. This is an important point on all of your putts, but it is especially important on lag putts where you have to make a big stroke. You need to make solid contact with the ball if you are going to control your speed, but that will be tough if you let your head move all around. Resist the temptation to look up early and keep your eyes focused on the top of the ball until it has rolled away. Nothing about your stroke should change significantly from shorter putts – you simply need to make a bigger stroke by using greater shoulder action back and through.
- Quiet lower body. You might feel like you need to engage your lower body in the stroke when putting from long distance, but that is rarely the case. Try to keep your knees in a stable position while swinging the putter. If your knees stay steady, the rest of your lower body should remain solid as well, giving you a better chance of hitting the sweet spot at impact.
- Relaxed grip pressure. You probably know that you are supposed to keep your grip light when putting – but that is easier said than done when you are putting from a long distance from the hole. Before you start your stroke on any lag putt, take a moment to make sure your grip has not gotten too tight. Relax your fingers, feel the weight of the putter as it hangs in your hands, and allow yourself to make a free-flowing stroke.
As you see your lag putting performance improve, you will find that you have more and more confidence on the course when you face a challenging two-putt situation. No longer will you have to fear those long putts that you encounter from time to time, as you will have the lag putting skill to conquer such a task.
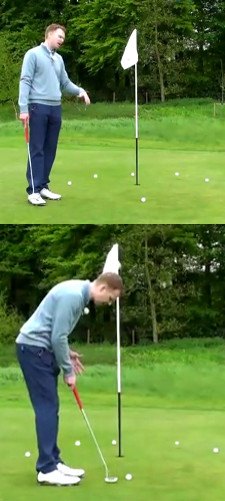
Short Putt Speed Control
When you think about distance control with the putter, you naturally think first and foremost about lag putting. This is when your ability to manage distance is really put to the test, after all. Those who are good with lag putting always have a significant advantage over their competition. With all of that said, distance control is also important when putting from short range. Why is that the case? Simple – the line you pick for your putt is always going to be tied to your speed. A putt hit with soft speed is going to break more than a putt hit firmly, so you have to be able to match up your line and speed if you hope to hole out on a consistent basis.
For this drill, we are going to work on rolling the ball a consistent distance stroke after stroke. If you can master this skill, you will know how fast you are going to hit your putts – meaning you will know how much break you should play to find the center of the cup. There is a little bit of setup involved in this drill, but the effort is worth it. If you add this to your regular putting routine, your performance from short range is sure to improve.
- To get started, you will need your putter, three golf balls, and a handful of tees. Find a hole that you can use for this drill in a relatively flat section of the green. Again here, you can move on to sloped parts of the green at some point, but it is best to start on a mostly flat piece of turf.
- Place one tee in the ground approximately eight or nine feet from the cup. You don't need to be precise with your measurement here – anything in that eight to nine foot range will work just fine. For a person of average height, taking three steps away from the hole is a good way to measure this distance.
- With the first tee in the ground to mark the spot from where you are going to putt, walk up to the hole and use the rest of your tees to create a semi-circle behind the cup. To measure out the size of this semi-circle, use your putter and measure from the putter head up to the bottom of the grip. This will give you a distance of somewhere in the neighborhood of two feet. Use at least four or five tees to create the semi-circle so you can easily see it from back where you will be putting.
- Now that the setup is complete, set your three golf balls down by the original tee and prepare to hit some putts. The goal is simple – you are trying to either make the putt, or keep the ball within the semi-circle behind the hole. By aiming for that semi-circle, you will be telling yourself to use enough pace to roll the ball at least to the hole – but not more than a couple feet past.
- Hit all three putts and check your results. How did you do? Were all three either in the hole or within the semi-circle? On your first try, the answer is probably not. This drill is going to be more difficult than you expect, as giving yourself only a couple feet behind the hole isn't much margin for error. Stick with it, fine tune your distance control as you go, and look for improved results as time goes by.
Once you get used to the setup for this putting drill, it will only take a moment or two to put everything in place. Try adding this drill to your regular routine, along with some lag putting work as outlined in the previous section. Distance control is important in short putting just as it is in long putting, and this drill will take you toward better control in your upcoming rounds.
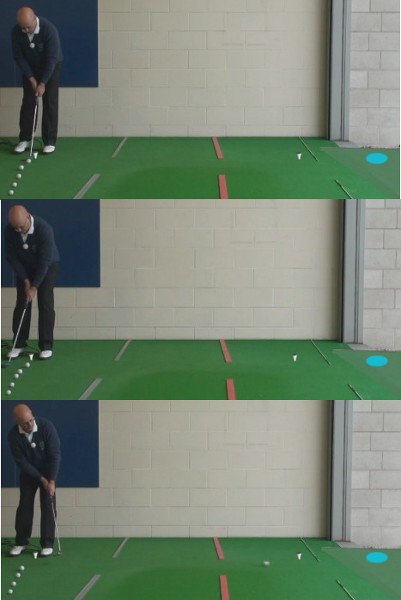
The Putting Ladder Drill
The ladder drill is one of the most popular in golf, as it can be used for both putting and chipping distance control improvement. This is a simple drill, it is highly effective, and you can easily incorporate it into your practice routine. Try using this drill at least once or twice during every practice session. Also, consider using it before you head to the first tee for a round, as it is a great way to get comfortable with the speed of the greens for the day.
If you would like to put the ladder drill to work in your own game, follow the steps below.
- To start, take five golf balls from your bag, along with your putter and a couple of tees. You will need to find an open space on the putting green for this drill, but you won't actually need to use a hole. You aren't going to be putting toward a hole while completing the drill. As always, you should start by selecting a relatively flat section of the putting green on which to do your work.
- Set your five golf balls down on the green in a spot that you have decided to use for this drill. From that point, take ten steps along your intended putting line and push your first tee into the ground. Then, walk another five paces, and put the second tee into the ground. This will leave you with approximately 15 feet between the two tees. When the tees are in place, walk back to the spot where you will putt from and prepare to roll the first ball.
- With this first putt, your goal is to roll the ball just barely past the first tee. If you come up short of the tee, you need to go retrieve the ball and start over. As long as you manage to roll the first ball past the first tee but short of the second, you can continue with the drill.
- Your goal with each subsequent putt is simple – you are going to try to roll the ball farther than your previous putt, without sending it beyond the second tee. In this way, you are forming a 'ladder' by adding one rung at a time as the putts go longer and longer.
- To complete the drill successfully, you have to fit all five putts between the two tees. Each putt should be longer than the one previous, but none of them should roll beyond that second tee. If you fail at any point along the way, retrieve the golf balls and try again.
This is one of the best golf drills available for learning how to control your speed. You will have to possess great feel in your hands in order to complete this drill without making a mistake along the way. If you find the original drill to be too easy after a little bit of practice, there are plenty of things you can do to make it a bit more difficult. For one thing, you can reduce the distance between the tees. Instead of five steps apart, place them three steps apart for a steep challenge. Or, you can perform the drill on a downhill slope, which will really test your skills. As mentioned above, this is a great drill as part of a practice routine or just as a way to prep for the round ahead. When the time comes to work on your chipping, feel free to carry over this same idea onto the chipping green.

The Two-Putt Drill
Sometimes, the best golf drills are the ones which closely replicate the experience you are going to have out on the course. Such is the case with this drill, which will have you putting around the green just as you would when trying to complete any hole during an upcoming round. This drill is as simple as they come, but you might find yourself quickly addicted to the challenge that it presents.
For this drill, you will need access to a practice putting green, a putter, and a single golf ball. To get started, set the ball down on the green and pick out a target hole. None of the targets you use should be particularly short putts, so try to challenge yourself by going halfway across the green or so. Once you have picked a hole, hit the ball and then finish out (assuming you didn't make the first one). Keep score as you go, and 'play' 18 holes to complete the drill. Par for this drill is 36 – two putts per hole – so you should make it your goal to finish under par.
This drill will help you master your distance control because you are going to have to lag the ball nicely in order to leave yourself short putts to finish each hole. If you are consistently missing your distance, you will have too many long second putts – and you will be bound to miss a few of them along the way. Once you have completed this drill alone, consider using it for a friendly competition against one of your golfing buddies. This drill is a natural to use for some competition, and competing against someone else will add a bit of healthy pressure to the situation.
Distance control on the greens is a skill you simply can't go without. If you are unable to dial in your distance control nicely, you will always have trouble moving your handicap in the right direction. Take time to use all of the drills offered above when you visit the course, and keep your eye on long-term progress in your short game. With the ability to two putt from just about anywhere, your game will have a newfound sense of confidence. Good luck!


