If you keep track of your golf statistics, you probably know how often per round you suffer a three-putt. Odds are, the vast majority are caused by poor distance control.
Most three-putts occur not because the player misses the hole by a wide margin, but because he comes up at least three feet short or long. Typically, he stalks off the green cursing himself for the missed comeback putt, when he should blame the lag attempt which left him so far away.
Improving your distance control on the greens will not only save you strokes, it'll reduce your stress. The fewer putts you face in the 3-5 foot range, the less pressure you put on your putting. This often creates a ripple effect that boosts your performance all the way back to the tee.
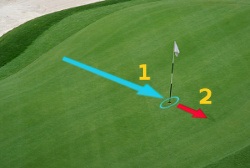
Any time you've got a putt of 25 feet or longer, the goal should be twofold: 1) Get it to the hole, but 2) Don't knock it more than three feet past. Outside of making it, the ideal result is a putt that stops within 18 inches of the cup – tap-in range.
Distance control takes experience and practice to develop. This series features three excellent drills – in both text and video formats – that will improve your long-range touch and cut down your three-putts.
Distance Control Golf Putting Drills
When you think about improving your putting, what do you think of first? Most likely, you think about doing a better job of hitting your target line. This does make sense, of course. If you hit your line, the ball will have a chance to grab the cup and fall in. If you don't hit the line, the ball is not going to wind up in the hole – it's just that simple. Unfortunately, hitting the right line is only one half of the putting equation. If you are going to perform successfully on the greens on a regular basis, you need to master your distance control as well.
Distance control when putting is one of the most overlooked skills in the game. Everyone knows that you need to hit straight drives to play well, and everyone knows that you should be able to hit relatively accurate iron shots. Also, you need to be able to knock your short putts into the cup to avoid wasting too many strokes along the way. Those points are all well and good, but they don't say anything about the skill of rolling the ball up to the cup with perfect pace. When you master this skill, you will save just as many strokes – if not more – as you can save when improving other areas of your game.
Think about it – you face long putts on a regular basis on the golf course. Approach shots which wind up close to the hole are the exception, rather than the rule. Most of the time, you are going to be putting from a significant distance away, hoping to two-putt. The ability to get down in two from the other side of the green – instead of three – will go a long way toward allowing you to reach your goals on the links. If you watch any golf on TV, you have probably noticed that professional golfers are brilliant at controlling their speed on long putts. This is basically a prerequisite for reaching the highest levels of the game. If you don't have solid distance control with the flat stick, you simply aren't going to reach the PGA Tour.
In this article, we are going to provide you with some drills you can use to improve your distance control while putting. These are simple drills to be performed on the practice green at your local golf course. You aren't going to need any equipment beyond what should already be in your golf bag. The use of these drills, along with some solid technical fundamentals, should allow you to steadily improve your distance control over the weeks and months to come.
All of the content in this article is based on a right-handed golfer. If you happen to play left-handed, please take a moment to reverse the directions as necessary.
Drill #1 – Long Distance Ladder
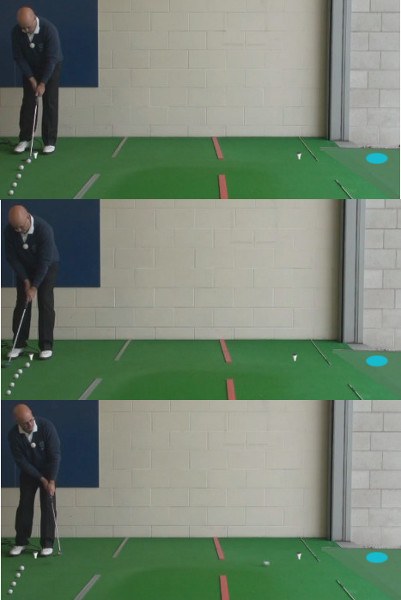
The ladder drill is one of the most popular drills in golf for speed control. It can be used for both putting and chipping applications. While it is typically used on putts and chips which are relatively short in length, we are going to stretch it out here to work on your distance control. While all of the drills we have included in this article will be helpful as you strive to improve your touch on long putts, this just may be the only drill you need to get better. It is simple, practical, and easy to add to your regular practice routine.
To perform the long distance ladder drill, follow the step-by-step instructions below.
- To get started, head to the golf course with your putter and a few golf balls (at leave five golf balls will be needed to complete the drill). Once at the course, make your way to the practice putting green and look for a long stretch of open surface where you can work on your skills. It would be best to visit the course during a non-peak time, if possible, so you can have plenty of space to practice. You are going to be hitting these putts most of the way across the green, and you don't want to be interfering with other golfer's practice sessions as you do so.
- Once you have found an open stretch of green, you are going to need to look for two holes that you can use as your targets for the drill. That's right – two holes. You aren't going to be aiming at the holes themselves, but you are going to use them as markers in order to control your distance – more on that later. The two holes should be close to in line from your perspective back at the ball. In other words, you should be able to roll your putts past the first hole and have them heading roughly toward the second. You won't be able to control the exact positioning of the holes, of course, but they should be roughly five paces apart.
- With your holes picked out and the path clear, it is time to get started. With your first putt, you are going to hit the first ball with the goal of just barely rolling it past the closer of the two holes. You aren't particularly worried about your line in this drill – the main focus is on controlling your speed. If you manage to hit the first putt past the closer hole but still short of the farther hole, the drill will continue. If your first putt either comes up short of the first hole or rolls past the second, you will need to start over.
- As you continue to hit successive putts, the goal is to hit each putt further than the one previous, while still keeping all putts short of the further hole. If any putt rolls past the longer hole at any time during the drill, or if you ever hit a putt which comes up short of the putt previous, the drill will be over and you can start again if you wish. Your goal is to fit as many golf balls as possible in between the two holes, following the proper procedure. You can consider the drill a success when you manage to fit five putts between the two holes, but there is no need to stop there – feel free to continue on and see how well you can do.
This is called a ladder drill because you are trying to add 'rungs' to the ladder with each putt. The obvious challenge is learning how to add just a bit of speed to each putt, without blasting it beyond the far hole. We can tell you right now that this drill is much easier to read than it is to complete. At first, you might be surprised to find just how difficult it is to squeeze a few putts in a row between the previous putt and the far hole. It will take practice and solid technique to actually make it through this drill cleanly. The drill is even more difficult when chipping, by the way, so feel free to try it out in that area of your game as well.
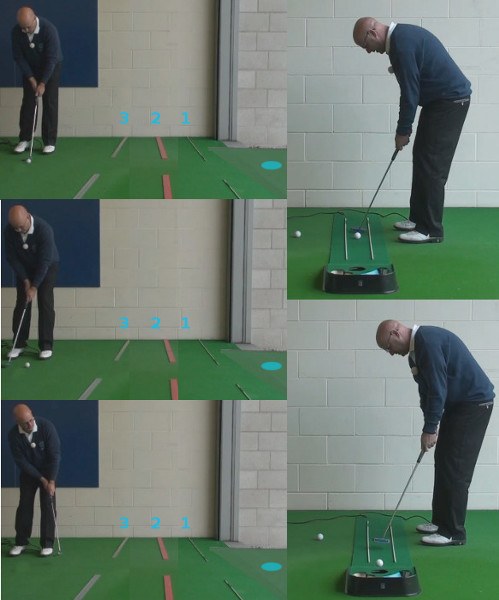
Drill #2 – The Two-Putt Drill
When we talk about distance control on the greens, we are really talking about your ability to two-putt effectively. You are never going to make a meaningful number of your long putts, even if one does manage to fall in from time to time. Instead of thinking about knocking those lag putts into the hole, you should only be thinking about leaving them close so you can tap-in and move on to the next tee. A player who consistently is able to two-putt from long range, and also takes advantage of closer opportunities with some one-putt greens, is going to be in great shape.
This drill is going to focus on your ability to two-putt from a variety of different positions. Just as was the case with the long-distance ladder drill, you will find that this drill is much easier said than done.
- Again, you will want to be at the practice putting green for this drill, however this time you'll only need a single golf ball. To get started, drop your golf ball on the side of the green, and scan the putting surface for a hole to use as your first target. The hole you select should be on the other side of the green – as far away as you can get, without having to get in anyone's way while you putt.
- With that first target picked out, there is nothing else to do but hit the putt. Send the ball on its way toward the hole and do your best to leave it close to the cup for a simple second putt. Hopefully it will only take you two putts to hole out, but continue putting until the ball is in the cup and make a mental note of your score. If it makes it easier to keep track of your score, you can consider a score of two to be 'par' in this game. Making your first putt would be a birdie, and three-putting would be a bogey.
- The drill continues on like this for a duration of 18-holes. In the end, that makes the total par for this game 36 – and managing to get through in even par would be a great effort indeed. You are going to keep picking different holes around the putting green as the drills moves along, so you should never face exactly the same putt twice. Most practice greens don't actually have 18 holes cut in them, so you'll need to be creative and keep finding new angles to use. All of your putts should be long ones to make sure the drill is sufficiently challenging. You can go through this drill on your own, or you can compete against a friend.
The great thing about this drill is the fact that it works on both your long and short putting skills. You will need to have quality touch from long range in order to set up makeable short putts, but you'll also need to have a steady nerve to finish off the job. Additionally, you are going to feel a bit of pressure when you get toward the end of the drill, especially if you have a good score going. This is one of the best drills you will find for replicating the feelings that you have while putting during an actual round of golf.
Drill #3 – No-Look Long Putts
You can learn just about everything you need to know about this last drill just from the title. To make sure you are doing a great job of keeping your head still while you hit your long putts – which is one of the biggest keys to success – this drill is going to demand that you keep your head down until the ball has stopped rolling. It might seem a bit extreme, but this is a great way to reinforce the importance of discipline during your stroke.
As was the case for the previous two drills, you can follow the directions below to give this drill a try for yourself.
- You'll again need your putter, a golf ball or two, and a practice putting green. As we mentioned in the instructions for the ladder drill, it would be helpful if you could head to the course during a non-peak time in order to have more of the practice green to yourself. Once at the green and ready to practice, set your golf ball down and pick out a target on the other side of the putting surface. Ideally, this will be a relatively flat put without too much slope in any direction. By finding the easiest-possible long putt, you can focus on executing your technique without giving much thought to the read.
- Everything leading up to the moment of impact in these putts is going to be exactly the same as it would be for any other putt. You are going to get yourself aligned properly with the target, take your stance, and take one last look up at the hole before making the stroke. The only thing you are going to do differently will take place after you have sent the ball on its way. Rather than looking up to see where the ball is going, you are going to keep your head down, staring at the spot on the turf where the ball had previously been resting. You are not going to look up until you are sure that the ball has finally come to rest. Only then will you take a look down toward the target to see how you have done.
- Feel free to repeat this drill as many times as you would like, hitting long putts back and forth across the green without watching them roll. Even though you aren't watching the ball roll toward the target, you should have no trouble assessing your performance based on the final location of the ball when it stops rolling.
You should notice that keeping your head down for this exaggerated amount of time will stabilize your stroke, allowing you to swing the putter through cleanly while hitting the sweet spot more often. No one strikes the ball perfectly each time in this game, but your performance should improve nicely as you accumulate more and more practice with this drill.
Do you need to keep your head down like this on the course? No – of course not. When you are actually playing a round of golf, you can feel free to watch the ball roll, but only after you have finished your stroke. As a rule of thumb, try to keep your head down and still until the putter has stopped moving. That way, you will be sure that there was no premature movement in your head or neck area that could negatively impact the quality of your putt.
This is a great drill to add to your regular practice routine. Consider hitting a few long putts without looking up during each of your putting practice sessions. Adding this to your practice habit will remind you of the importance of keeping your head down and still while playing long putts. Even if this drill only saves you one stroke per round, it will have done its job nicely.


