In early 2013, America's Stacy Lewis climbed to the top of the women's world golf rankings on the strength of excellent putting.
She credited a simple drill with enhancing her feel on medium- to long-distance putts.
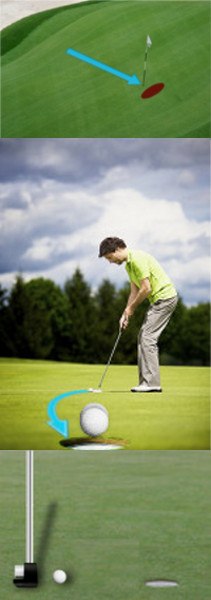
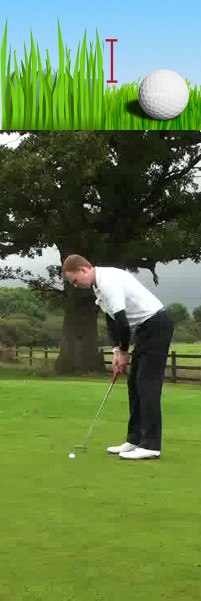
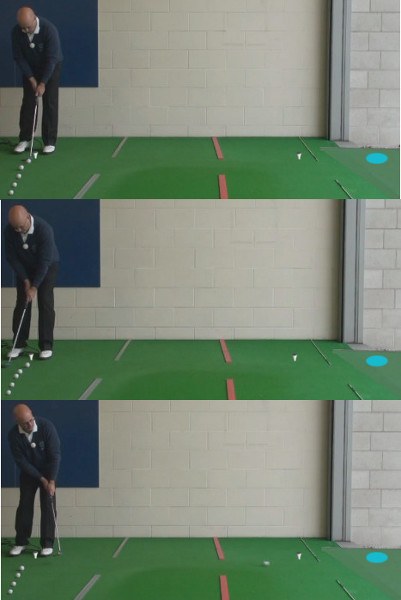
Add this routine to your practice sessions and you'll enjoy the same benefits:


The drill will teach you to swing the putter smoothly without consciously thinking about how far you want to hit the ball. Developing deeply ingrained feel will serve you well on putts of all lengths.
Follow this link for additional drills to improve your feel on the greens:

Golf Drills to Improve Your Putting Feel
Having a good feel for your putting stroke, and for the greens that you are putting on, is paramount when trying to shoot the lowest score possible. Sure, it might be fun to swing as hard as you can from the tee, but nothing will ever match putting in terms of importance to your score. You have to roll the ball well in order to post good scores – it is just that simple.
When people talk about having good 'feel' with the putter, they are almost always talking about speed control. Feel, in golf terms, is generally the ability to hit the ball the desired distance on a given shot. This isn't so much of a problem from the fairway where you can pick the right club from the job, but it can be extremely difficult on and around the greens. Obviously, when your ball is on the green, there is no club selection choice to be made – you are going to be using a putter. Therefore, dialing in the right distance for the shot comes down simply to your ability to 'feel' how hard you need to swing. There are a number of different elements that come together to create feel, and it is certainly something that can be improved over time.
One of the best ways to improve your feel is through the use of some practice drills. As a golfer, you are likely familiar already with the concept of practice drills. By using drills that specifically address deficiencies in your game, you can improve one piece at a time until your overall game is drastically better than before. There is no one drill that is going to solve all of the problems you face on the course, so you will likely want to collect a few different practice drills that you can use regularly to work toward your goals. By doing the drills you have selected each time you practice – and doing them correctly each time as well – you will be on a path that leads toward lower scores. Nothing comes quickly in terms of getting better at this difficult game, but you can feel confident that you are on the right road as long as you stick with your drills.
In the content below, we are going to identify and explain a few drills that can help you improve your feel with the putter. Again, you shouldn't expect any 'miracle' results, and you certainly shouldn't expect to be a dramatically better putter in your very next round. It will take time to see notable results, so you need to be patient and stick with it. In the end, you will be proud of the progress that you have made when you see more and more putts start to fall in the bottom of the cup.
All of the instruction below is based on a right handed golfer. If you happen to play left handed, please take a moment to reverse the directions as necessary.

One Hand at a Time
This is a classic putting drill, and it has remained relevant through the years because it is so effective at teaching the player how to feel the putter throughout the stroke. Quite simply, you are going to hit putts with only one hand on the club at a time. By making your stroke with only one hand on the club, you will be able to better feel how that hand influences the movement of the putter. Then, when both hands come back together on the putter, you should be able to take what you have learned and bring it all together for a quality, consistent motion. This drill is undoubtedly simple, but it is also extremely effective.
To perform this drill during your next practice session, follow the step below.
- Take your putter and six golf balls and head to your local course for some putting practice. You could work on this drill at home if you have a putting mat – or even some carpet that runs nicely – but it will be best performed at the course on an actual putting green.
- To get started, find an available practice hole and place the golf balls down on the green around 10 feet from the hole. You want to find the flattest putt possible for this first set of putts, just to keep things simple. Once you get the hang of the drill, you can feel free to move on to harder, sloped putts. When you have picked out your spot, place a tee in the ground to mark your starting point so you can hit several sets from the same spot.
- Put all six golf balls on the ground near your tee and prepare to hit some putts. It is important to note that you should be taking your normal stance over these putts, and you should have a target in mind just as you do when on the course. You may find it easiest to take your stance with both hands on the putter before taking one hand offer just before starting the stroke.
- For the first putt, use only your left hand to send the ball toward the target. Even though you are only using one hand, do your best to make the putt. With that first putt completed, switch hands and use your right for the next putt. Go back and forth between hands until all six balls have been rolled toward the hole.
- You can repeat this process as many times as you would like, and you can start to move around the green as well to try different types of putts (uphill, downhill, longer, shorter, etc.). While this is a great drill to improve your feel, it shouldn't be the only thing you do while on the practice green. Be sure to leave plenty of time for hitting normal, two-handed putts after you are done with the drill.
For most golfers, this drill is going to highlight the fact that the left hand controls line while the right hand controls speed. You are probably going to do a better job of getting the ball on line when putting left-hand-only, but your speed control should be better when it is the right hand swinging the club. Through the use of this drill, however, you can bring those differences closer together over time. The ultimate goal is this – to be able to putt equally successfully with each hand during practice, so you can be confident that they are both doing their job out on the course.
If you lose your feel during a round of golf, go ahead and make some one-handed practice strokes while you are waiting for others to putt. You can't actually hit practice putts during a round, but there is nothing stopping you from using one-handed practice strokes to regain some of your feel. This drill alone won't make you into a great putter, but it certainly can be a big help in the search for the feel you need to succeed on the greens.

Long Range to the Fringe
A big part of learning good touch on the putting green is simply going through enough repetitions to teach your hands how to feel the speed of the ball coming off of the putter face. There is no substitute for experience when it comes to teaching yourself how to putt, so make sure that the short game takes up a big chunk of the practice time that you have available. Most amateur golfers prefer to spend their practice time working on the driving range rather than the putting green, and the results speak for themselves. By dedicating yourself to the practice green – for both putting and chipping work – you can build a short game that stands out from the pack.
For this drill, you are going to hit a number of long putts across the width of your practice green to get a great feel for the speed of the grass. Knowing how to control your speed from long range is a great way to save strokes, as distance control is the best way to avoid three putting. As you already know, three putting can quickly ruin your score during a given round, even if the rest of your game is in great shape. Everyone loves to one putt as often as they can, but it is frequently the tough two putt that will keep your round on track toward a successful conclusion. It is hard to recover from a three putt or two, so do your best to keep those mistakes off your card.
If you would like to use this drill to improve your feel for the distance of your putts from long range, follow the steps below.
- You will only need to have your putter, three golf balls, and an open section of putting green in order to perform this drill. Since this drill is all about long putts and learning green speed, you really can't do it at home – you need to be at the course for this one.
- If the putting green is crowded, do your best to find a path across the green that isn't going to get in anyone's way. Obviously, if you can't find a path across the entire green, you can use just a section – but do your best to find the longest putt possible.
- You aren't going to pick out a hole to use as a target for this drill. Instead, you are going to be using the fringe (or collar) of the green as your target. The idea is to roll the ball up as close to the edge of the fringe as possible without actually putting the ball off the green. This drill isn't concerned with the line of your putt – only the speed. Make it your goal to roll the ball up within a couple feet of the fringe on each putt. Once you have hit all three putts, walk across the green to retrieve your golf balls and then putt them back in the other direction.
- Of course, you can use this drill back and forth across the green for as long as you would like. However, remember to fit in time for work on your shorter putts before you need to call it a day.
For some golfers, it will be kind of 'weird' to practice putting without aiming at a hole, but you want to keep your mind free from targets so you can focus solely on speed. If you ever watch golf on TV, you will notice that the best putters – and the players at the top of the leaderboard – tend to have great control over the speed of their putts. By spending at least a small portion of your practice session on this long putting drill, you can work toward the goal of always having control over how far your putts travel. Also, since green speeds change on a daily basis based on weather and other factors, this is a good drill to integrate into your pre-round routine. Even hitting just a few putts across the practice green before heading to the first tee will give you a much better chance of getting your round off to a good start.

No Look Putting
One of the first golf tips most players receive when getting started is to 'keep their eye on the ball'. While that is good advice most of the time, it is a tip that we are going to ignore for this particular drill. In this case, you are going to be closing your eyes as you putt in order to take away the advantage of being able to see what you are doing. Instead, you are going to go solely by feel when trying to roll the ball toward the hole, and you will develop other senses in the process. Putting with your eyes closed is likely not a good idea on the course, but it is a great way to teach yourself how to feel the stroke during practice. After you are finished with this drill, you should find that you have a much better feel for the movement of the putter when you open your eyes back up once again.
Just as was the case with the previous two drills, follow the step-by-step instructions below to perform this helpful routine.
- For this drill, you will again need your putter (obviously) in addition to three golf balls and a tee. When you get to the practice green at your local course, pick out an available hole and find a spot around three feet from the hole that leaves you with a relatively flat putt. Place the tee in the ground at this point.
- Putting from the tee you have pushed into the green, you are going to roll all three balls to the hole, one at a time. To hit the putts, you are going to go through your normal pre-putt routine – with your eyes open. You are going to get all the way to the final moment prior to starting your stroke before you need to close your eyes. The last thing you do before hitting the putt is to close your eyes. Once your eyes are closed, go ahead and start the stroke and roll the ball toward the cup. Keep your eyes closed even after the ball has left the putter face, and listen for it to either fall in or not.
- Spend plenty of time working on this drill from three feet away before moving on. You should be able to make the majority of your putts from this range even with your eyes closed, as there isn't much you need to see at this point. As long as the fundamentals of your stroke are sound, the ball will go in more times than not.
- Once you are happy with your performance from short range, you are going to take the tee out of the ground and move it back to around ten feet. Going from three feet to ten feet is going to make this drill significantly harder. You will now have to focus on speed control, and you will have to make solid contact in order to roll the ball the proper distance. While this is going to be a challenge, it is also going to help you immensely in the quest for improved feel.
- Feel free to continue using this drill from a variety of distances to keep improving on your ability to feel the stroke. Of course, before calling it quits for the day, be sure to hit a number of putts with your eyes open once again.
Overall, this is one of the best drills available for improving your feel on the greens. You will be amazed at what you will learn about your stroke when you have to go by feel alone rather than sight, and you will almost certainly be a better putter when you head back out for your next round. Rolling the ball with the proper speed time after time is a crucial golf skill, and this easy drill can help you develop that skill moving forward.

The Ladder Drill
In many ways, we have saved the best for last. This is perhaps the single-best putting drill when it comes to developing feel, and it is easy to set up (although difficult to complete successfully). Using the ladder drill on a regular basis is sure to improve your speed control in short order, so you can hopefully reduce your number of three putts dramatically after spending some time with this drill. Follow the steps below to add your name to the long list of players who have benefitted from working on the 'ladder'.
- For our final drill, you will need to have five golf balls, your putter, and two tees. Also, you will need to find a spot on the putting green where you can set up about 30 feet away from a target hole. Ideally, you will be able to do this drill on a day when it is quiet at the course so you don't have to deal with other golfers moving back and forth across the green.
- Place one of the two tees into the ground at a spot around 30 feet from the hole. Just as with previous drills, this putt should be as flat as possible in order to eliminate break from the equation. Take the other tee and place it into the green approximately five feet short of the hole along your intended line.
- Put the five golf balls down on the green next to the tee that is 30 feet from the hole and get ready to hit the first putt. Your objective is simple – to roll the ball past the tee you set up five feet from the cup. However, while rolling the ball past that tee, you also need to come up short of the hole itself. You aren't actually trying to make this point, you are only trying to roll the ball between the tee and the hole.
- With the next putt, your goal is to hit the ball farther than the first ball, yet still short of the cup. Obviously, this task will be easier if you barely rolled the first putt past the tee.
- As the drill continues, the pattern stays the same. You are trying to hit each putt farther than the one before, while always staying short of the hole. If done correctly, you should be able to fit all five putts in the window between the tee and the hole – although this is rather difficult to pull off at first.
No matter which of the drills above you decide to use, simply spending time practicing your putting with the help of these routines will put you on a path toward better feel. Your performance on the greens is largely what is going to determine your score, so spend time on these drills and be prepared to post lower numbers in the near future.


